Managing Tags in AWS Resources
Managing Tags in AWS Resources
Table of Contents
Add or Delete Tags on a Single Resource
Adding Tags on a Single EC2 Instance:
- Go to the resource you want to tag, in this case, we will access our Amazon EC2 Console.
- Ensure that the correct Region is selected in the navigation bar at the top of the screen (In this lab, we are using the Singapore region).
- Click on the resource you want to tag from the list of resources, select the Tags tab, and then choose Manage tags.
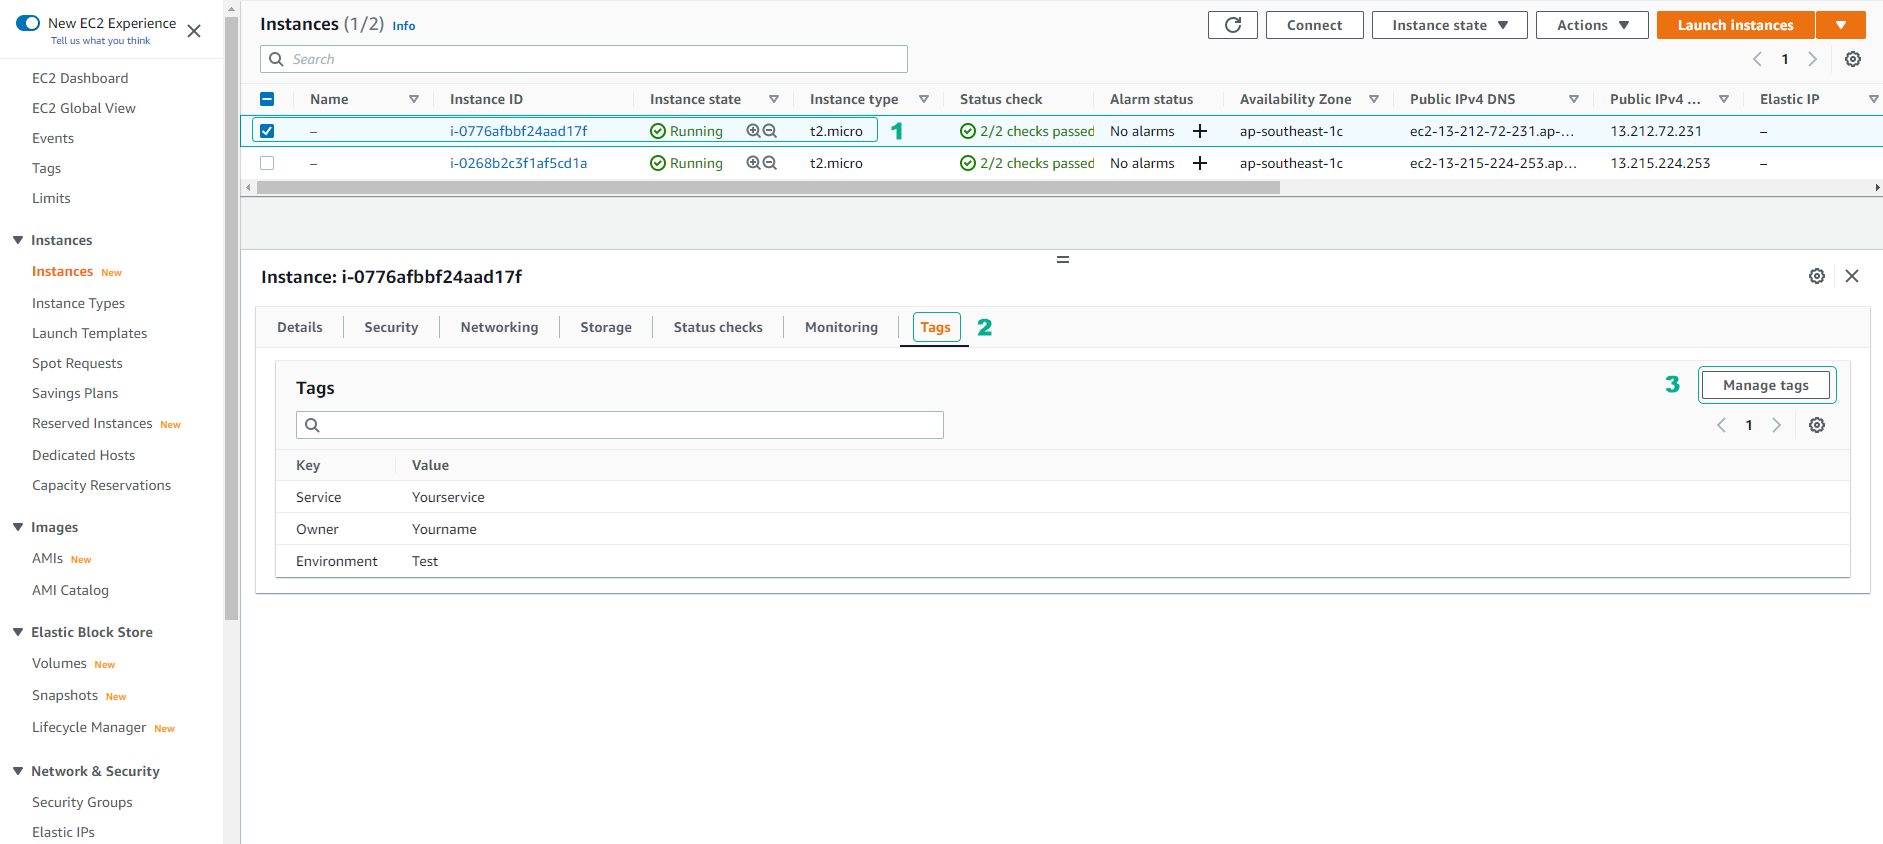
- Next, click on Add tag. Enter the Key and Value information for the tag as shown below and click Save.
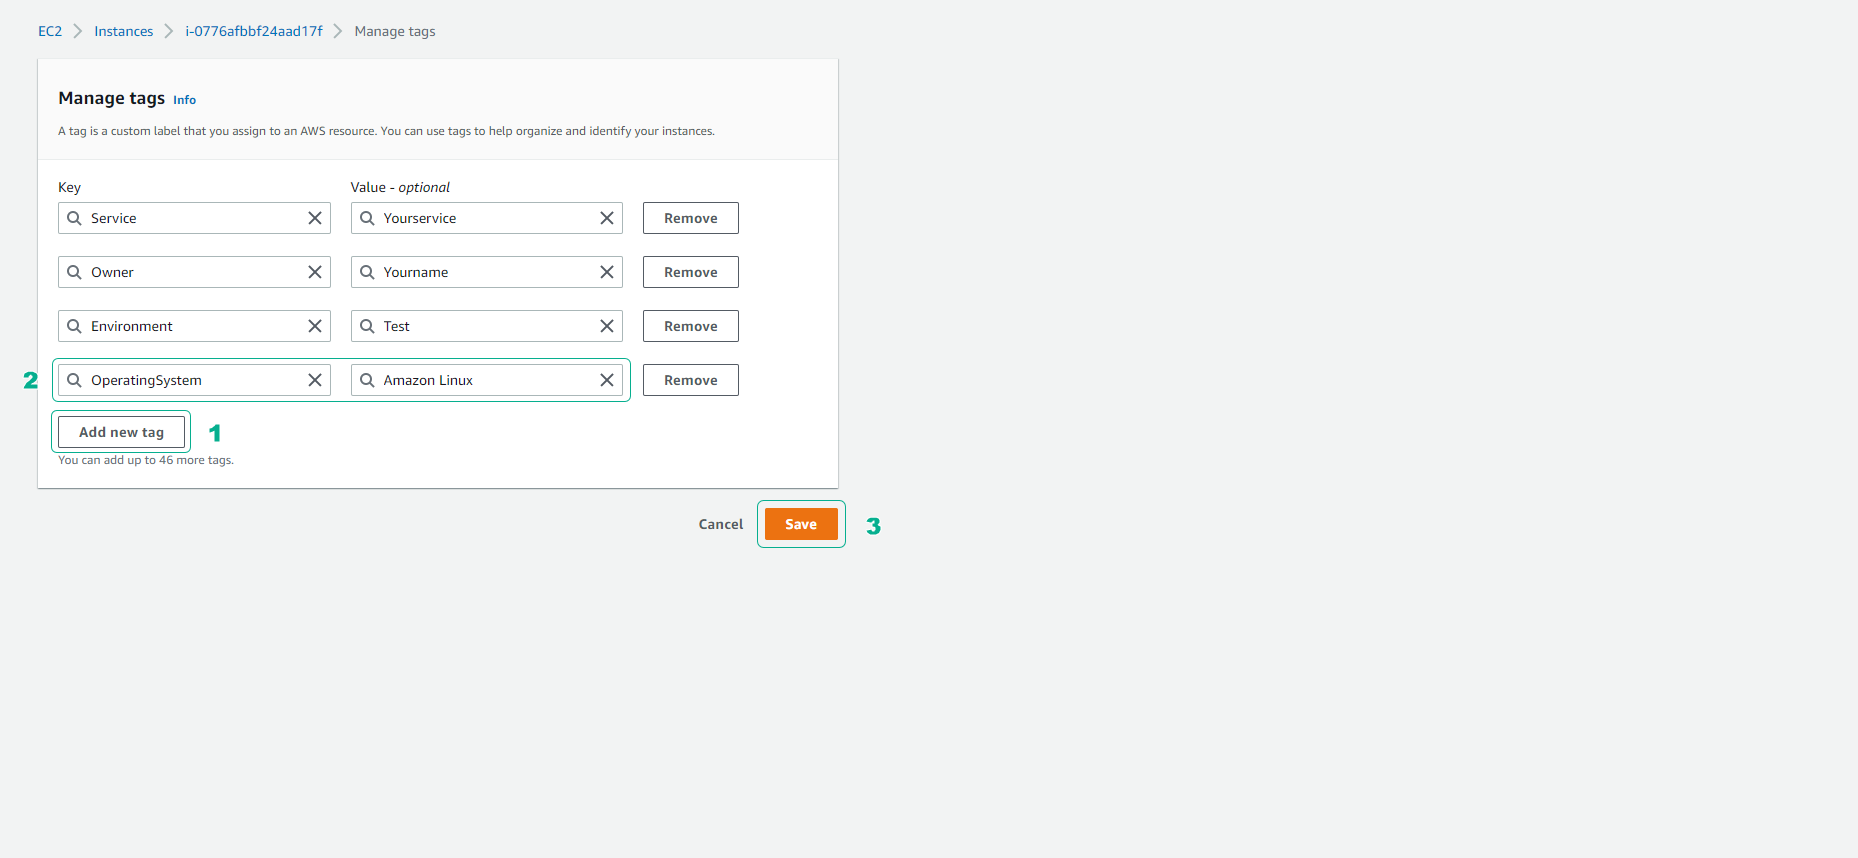
By following these steps, you have successfully added a new tag to identify the operating system for the EC2 Instance.
Add or Delete Tags on Groups of Resources
Adding Tags on Multiple EC2 Instances:
- Access the Amazon EC2 Console.
- In the left pane, select Tags.
- Choose Manage Tags.
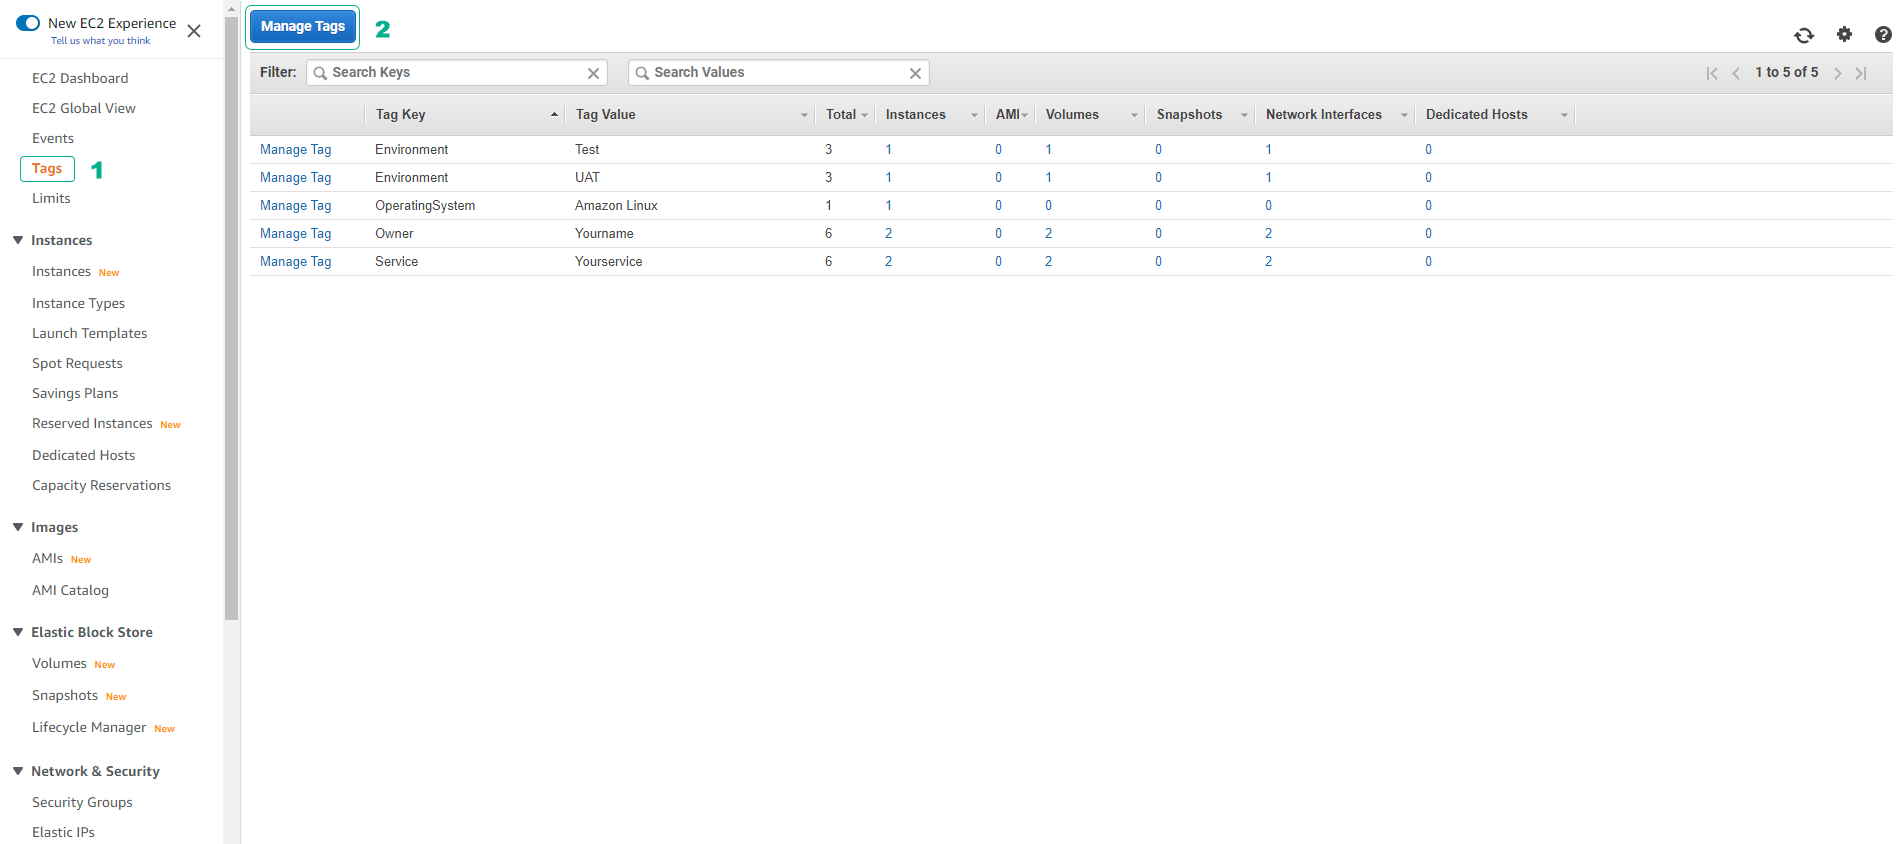
- On the Manage Tags page, select the type of resource you want to filter (for example, Instances).
- To add tags to the resource group:
- Select the resources you want to tag.
- In the Add Tag section, provide the Key and Value of your desired tag, and then click Add Tag.

- To delete a tag from the resource group:
- Select the resources from which you want to remove a particular tag.
- In the Remove Tag section, provide the Key and select Remove Tag.